
My goal for this dress pattern is to make a size 10 dress that I can include in my Operation Christmas Child shoeboxes for girls in the ages 5-9 group. At first it may be long in length for a younger girl, but better something that she can grow into rather that starting out to be too short. The shoulder straps are fully adjustable.
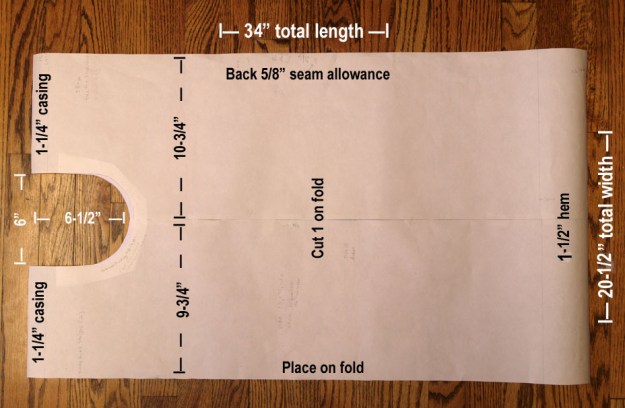
The pattern shape is a simple rectangle, sized 34″ x 20-1/2″. You can adjust according to your fabric length. A U-shape is used for each armhole. There is only one vertical seam, the back seam.
Some things to consider when picking fabrics: very fine ribbons and fabrics might not hold up to repeated wearing and washing, and try to pick out fabrics that aren’t sheer.
Cut pieces of fabric for:
Dress: fold fabric selvage to selvage and place pattern on the foldline. The fold is the center front of the dress. Cut out dress.
Pocket: cut 1 @ 14″ x 7″ (or 7″ by 7″ with one edge on fold). Also, feel free to pick your own size for a pocket.
Underarm bias strips: cut 2 @ 18″ x 1″ at 45° angle. These pieces will make 1/4″ bias strips.
Shoulder strap ties: cut 2 @ 34″ x 2″ on grain. These pieces will make a 1/2″ wide strip.
Sewing Instructions:
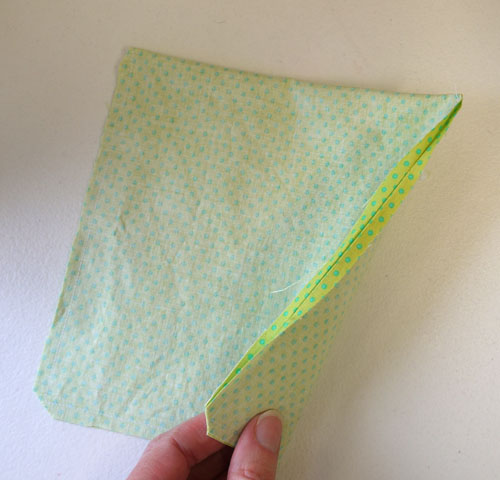
Pocket is easiest sewn on before the back seam is sewn up. Fold pocket piece right sides together to make a 7″ x 7″ square. Using a 1/4″ seam allowance stitch around the 3 open sides. Leave about a 3″ opening on one side to turn the pocket right side out. Trim corners diagonally and then turn pocket to the right side. Press pocket flat and turn the opening’s seam allowances in 1/4″. This makes it easier to line up the two edges of the opening later.
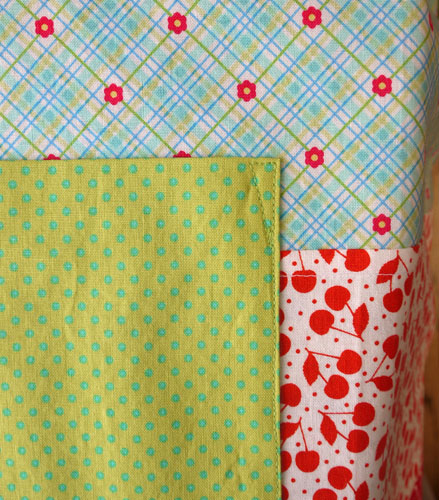
I place the pocket on the dress fabric about 10″ above hemline and 1-1/4″ to the left of the center. The foldline is the top of the pocket. Use quite a few pins to hold it in place for stitching as it seems to want to move around when stitching. I stitch the pocket on the dress as close to the edge as possible. This also closes up the opening from turning the pocket. I reinforce the pocket’s top edge by stitching along the fold 1/4″ and angling my stitching line back towards the pocket’s edge. See below photo.
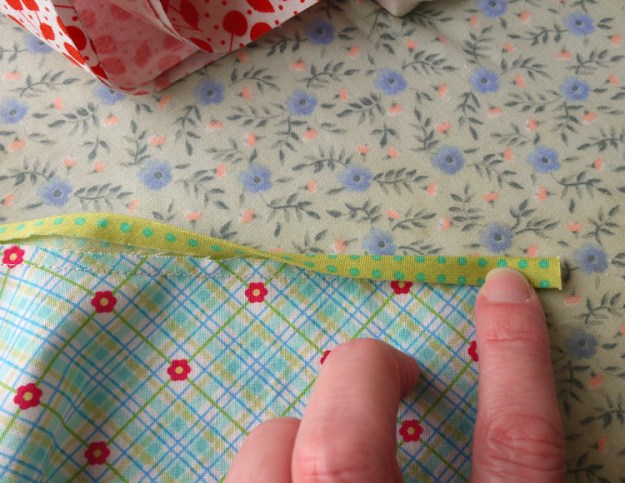
Next, work on the armhole edging. I use a Clover 12mm bias tape maker, but you can press your own by pressing each strip in 1/2, then press each raw edge to the center fold. Then, fold in half again to make the 1/4″ width.
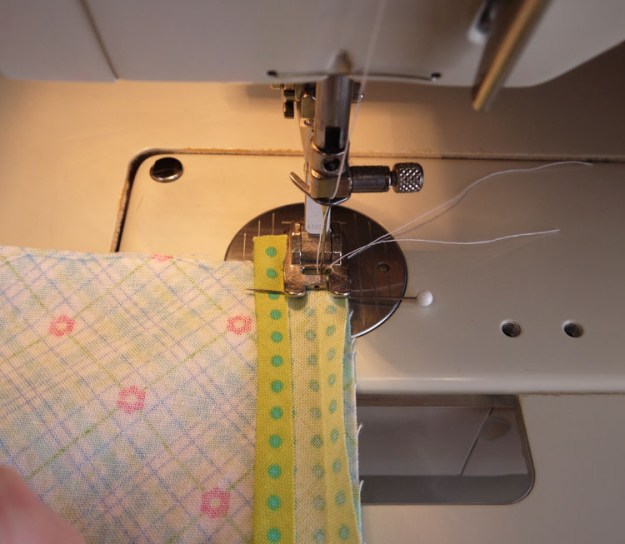
Sew the bias strips to the wrong side of dress. See photo below. I use a scant 1/4″ seam allowance to avoid the possibility of this stitching not getting covered up when the binding is folded over to the right side. (This happened with my first dress.) To do this move your needle position the tiniest bit into the seam allowance. Also, mark off where the curve of the armhole begins and ends with pins pinned to the dress piece. When you get to the curved area slightly stretch the binding as it is being sewn on. This makes it hug the curve nicely.
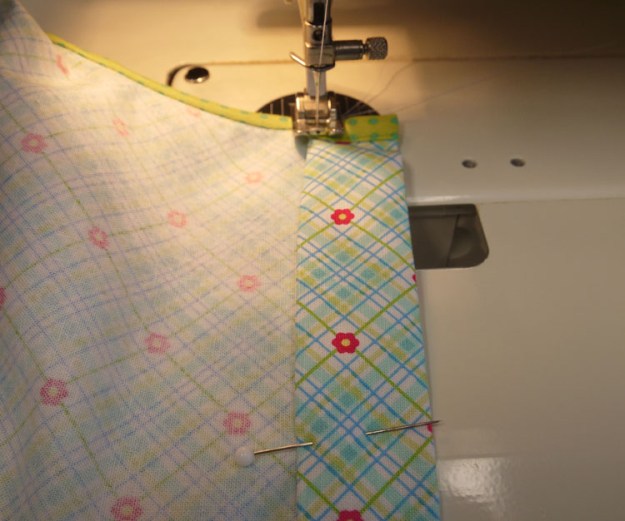
Then, pin binding to the right side of the dress and edge stitch in place. I like to press the binding before pinning and stitching.
Trim the binding to be almost even with the top edge of the dress. Leaving it a tad longer makes it easier to fold over when creating the casing for the shoulder ties.
Next, sew the back seam. I use a french seam to thoroughly encase the raw edge. You can stitch and serge, stitch and zigzag the raw edge, or stitch and pink. Try and make it as sturdy as possible though.
The hem can be completed next. Fold up 1-1/2″, then fold raw edge to pressed fold to make a 3/4″ width. Stitch from the wrong side close to the edge.
Next, stitch the casing for the shoulder ties. Press down 1-1/4″, then turn raw edge under 1/4″. Pin in place and stitch close to the edge.
The shoulder strap ties are made with the Clover 25mm bias tape maker or you can make them without like the armhole bias strips are made. Because these strips are cut on grain they will not stretch out of shape when tied into bow. Turn under 1/8″ on each end, and then press into 1/2″ wide strips. Edge stitch along all edges of the ties.
Using a safety pin or bodkin to pull the straps through the casing. Be careful not to twist the straps. I add a vertical machine stitch down the center front and center back of the casings so that the straps cannot be pulled out. Make sure there is the same amount of strap sticking out on each side first.
Below are my first five dresses. I am using up smaller lengths of fabric from my stash before going out to purchase longer lengths. If you also want to piece together fabric, make sure you square up or straighten the grain along the raw edges where the two will be sewn together first.


