
Sewing on Metal Snaps
Tips on How to Begin
I used to HATE sewing on snaps. I found there was a 50/50 chance that they would line up correctly. I don’t know how many times the second half of the snap would get ripped out because it didn’t line up perfectly. Ugh!!!
I finally figured out a way to be assured that they would line up correctly. All it took were a couple of straight pins. This task isn’t so hated now that I know they will be perfect the first time. I still don’t love sewing on snaps, but I find it relaxing to shut down the brain for a bit.
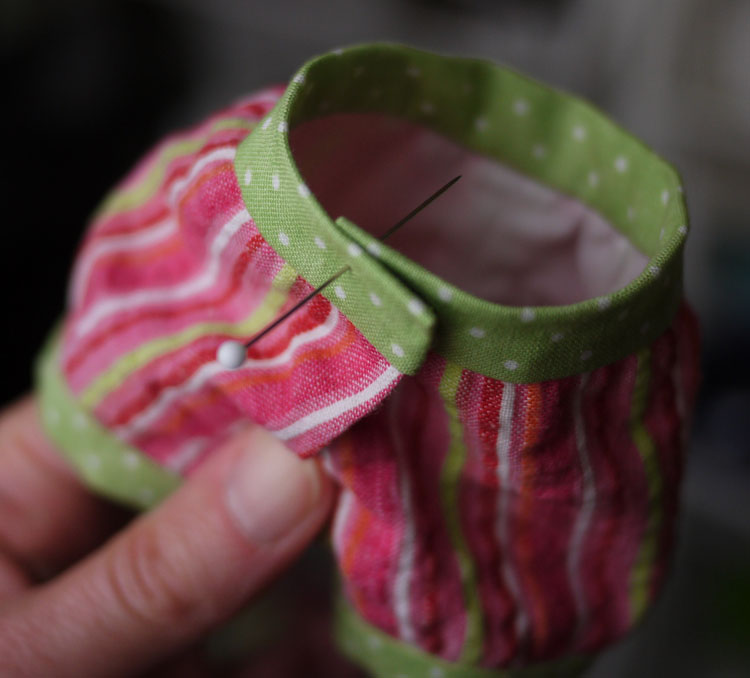
In these pictures I am sewing the second snap onto the waistband of these bloomers. (I use long stainless steel pins.) Hold the garment closed so it lines up exactly how you want it to look when snapped. Keeping the garment held closed, stick the pin through the front and back of your garment (all at once) where the center of the snap should be. In this case I wanted the bottom of the waistband to have a snap close to it’s upper corner. Slowly pull the two sides apart a bit, but not all the way. You will pull the pin out of the bottom layer only, but only after you can eyeball where it was. I will wiggle the pin to move the threads so that the pin makes a tiny space. Next, insert another pin into the bottom layer. I go top down to set the hole then come up from below so the snap can string right onto this pin. Sounds fiddly, but it works.
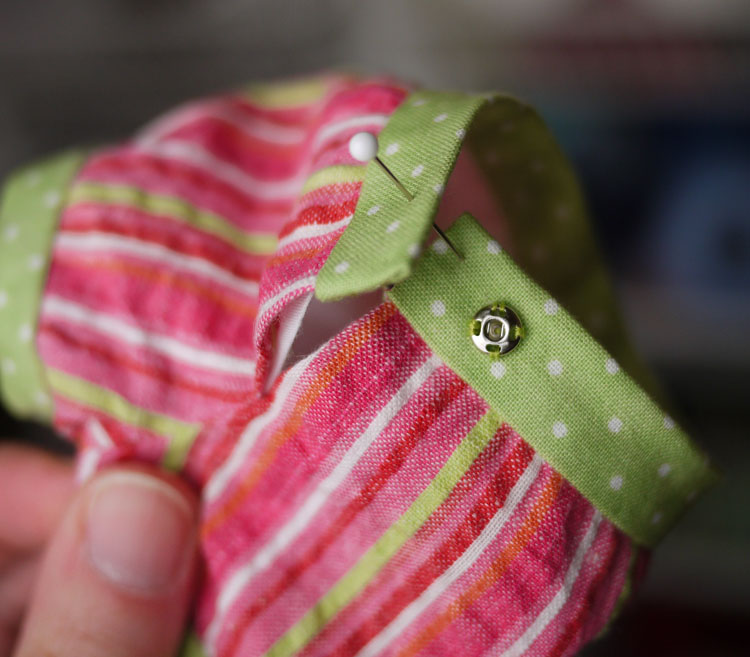
 Here the pins are ready to accept the snaps for sewing.
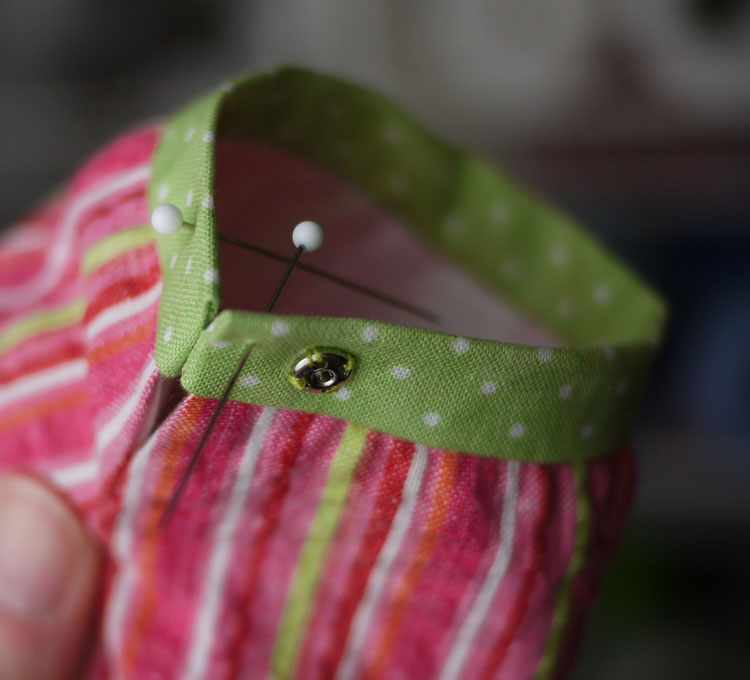
 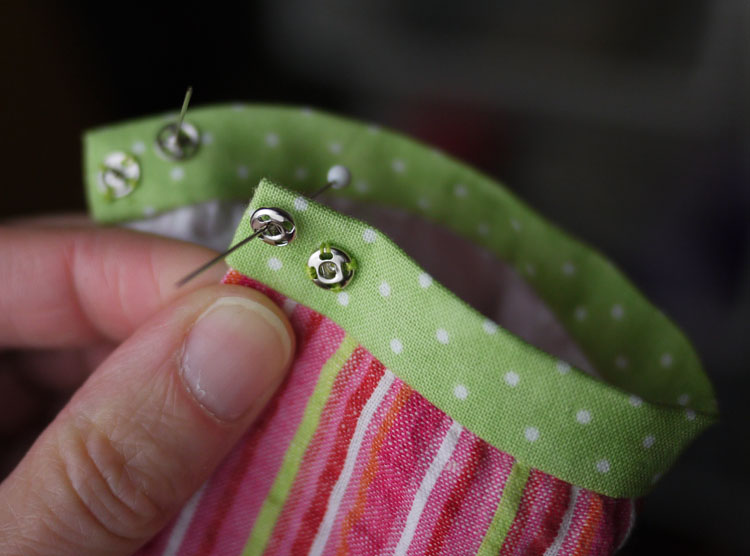 Obviously, you want to thread one snap at a time while you are sewing them on. I am just showing you how the snaps look on the pins. (Keep both pins in place though. The other pin should stay while you are working on the other.) While you are sewing the snap, it helps to keep the pin in place until you have at least the 3rd hole partially attached. These little guys like to shift around and the smallest movement will mess up your perfect alignment.
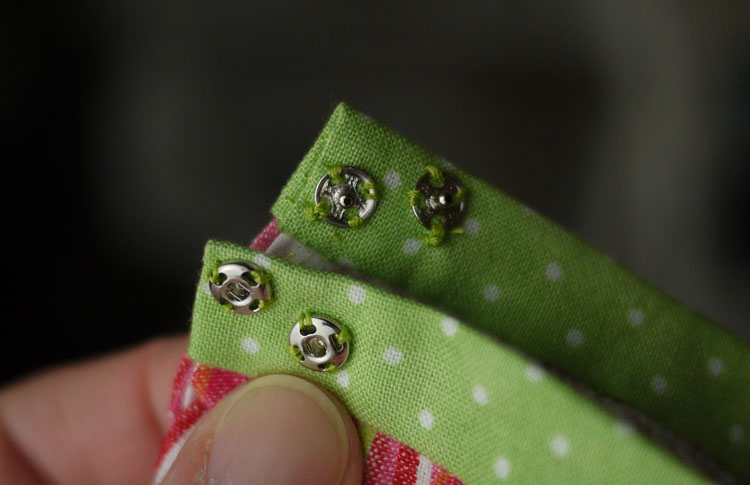 Here are both sets of snaps sewn on. I like to angle them on wider bands so they are close to the corners of the band on the top and on the bottom. I use two sets to keep wider bands and straps from twisting.
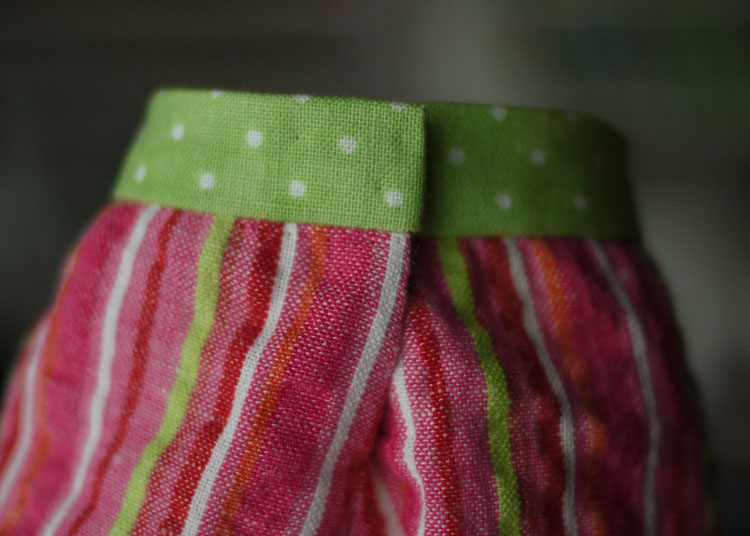 Here is what the bloomers look like all “snapped up”. I will add tiny buttons on the waistband for fun.


Super tutorial even for someone who has been sewing for 60 years. Thanks for sharing.
You’re welcome, Sandra. Hope it helped you some.
I will definitely try this — I am not a fan of snaps either. Thanks for the tip 🙂
You’re welcome, Linda. I hope this makes them a bit easier.