
Today I thought I’d share a little Photoshop Elements retouch trick that I use to warm up my doll’s skin tone. I take my indoor photos with a variety of lighting going on in the room: natural, fluorescent, and a studio light. The season, time of day, colors in the outfit, and doll’s skin tone will all affect the feel of a photo. I often get photos that seem greenish, which I don’t like. Often a tiny tweak will take a greenish skin tone and make the doll look warm and healthy without affecting the colors in the outfit.
First of all, I am NOT in any way a Photoshop Elements expert. I know what I know to get the job done, and that’s it. Secondly, my Photoshop Elements is number 6 and I think they are up to number 14, so my version may be quite a bit older than yours is. Also, my screen shots may look different if you have a different version, but hopefully the newer version will still have the same capabilities.
Here are some before and after photos.


Here is Talyssa wearing green. Since red and green are opposite (complimentary) each other on the color wheel, tweaking this photo to make Talyssa rosier starts to muddy her green sweater, so very little can be done here. The first photo (untouched) is closer to the real colors, however you can see she looks quite sallow, her skin is very ivory. Talyssa is always my hardest doll to photograph. I move her around a lot because I may find she looks better in a different location. The best photos I took of her were in front of the Christmas tree; I’m looking forward to getting that up again for her photos. Also, outdoor light doesn’t look too bad either.


Since the springtime, when I thought the magnolia blossoms would be pretty with Patience’s similar colored cardigan, I’ve been taking most photos outdoors. I use Auto White Balance set in my camera and have found that outdoor photos need much less help, especially if taken when the light is warm outside. BTW, for indoor photos I set my white color balance to a piece of glossy white photo paper.
Here are the screen shots of the steps involved, so you can try this out if you’d like.
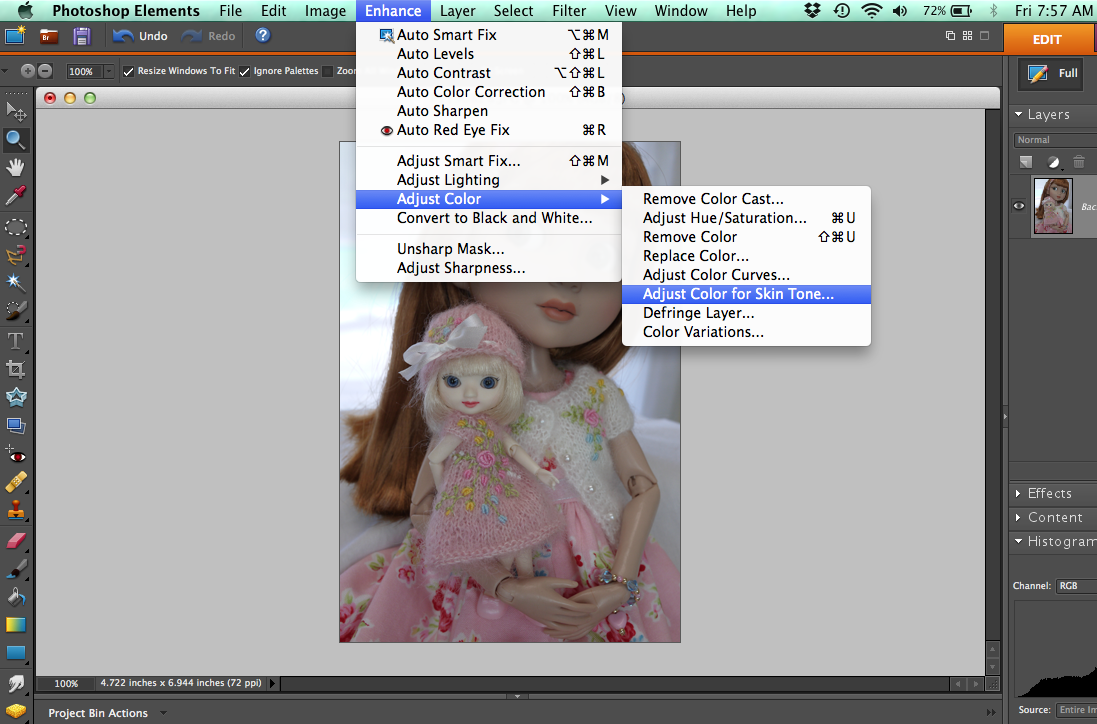 Under the Enhance tab you’ll see adjust color with an arrow, go to adjust color for skin tone and this window will open up.
 Your cursor will turn into an eyedropper. Place it over an arm or any part of the doll’s skin and click. The photo will color correct. You can them play with the sliders. I will often use the ambient light slider and go very slightly cooler or warmer. You can always reset (or don’t save photo) if something strange happens.
There you go, something new for you to learn today (if you want to). 🙂
Have a great Friday!

